I suppose my resolution to start blogging again should include actually writing a post that has something to do with the topic of this blog – home renovation. Which means that I should actually do a project or 2 around the house.
Fortunately, we just had a 3-day weekend so in addition to sleeping in, a night out in San Francisco & attending a bbq (thanks for the tri-tip Rachel!), we were able to squeeze in a few home projects.
Now we didn’t get nearly as much done as we did last year during our 1st weekend in the new house when we tried to get as much done as possible before moving in at the end of the month. But we did tackle a few things:
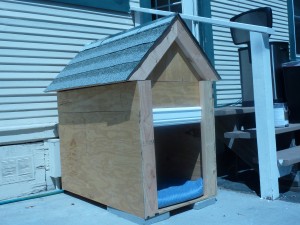
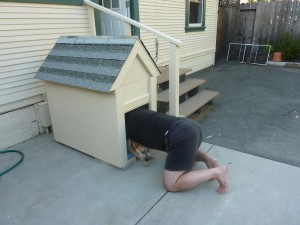
Project #1 started when I came home from work during the week and Hugh told me to go outside to see what he did. To my surprise, I found a huge new dog house that wasn’t even in the planning stage when I left for work that morning.
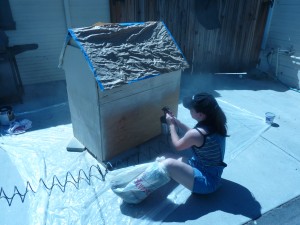
Then Hugh’s Saturday trip to Home Depot included a surprise for me – a spray paint attachment for our air compressor! Awwwww….that means he really does love me :) (wow, have I changed over the last year). As part of my prep for the upcoming kitchen cabinet painting project, I’ve been taking on various furniture painting projects to improve my painting technique before committing to the kitchen cabinets. It’s ok if I have some imperfections in Craigslist finds or cheap furniture we already own, but it would really bother me to see them in the kitchen. I’ve done a number of projects with rollers & brushes, but I wanted to give spray painting a try to see what the results were and how much time it saved.
That’s a lot of babbling to simply say that part of our weekend was spent spray painting a dog house that probably has a better roof than my own house.
Did I mention the fact that I have a broken ankle in my excuses post?

Not the most flattering angle, but this shows (half) of the lovely footwear I've had to wear for the last 1.5 months
 I was tired of not getting anything done so did some improvising (sponsored by HomeGoods)
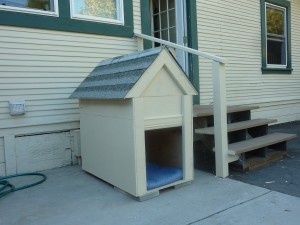
After some experimenting with settings & adding water to thin the paint, we loved the spray gun and can’t wait to use it for more projects. We still have plans to bedazzle this to bring out more of Wally’s personality but it’s looking really good now:
Project #2 was somewhat related to #1. One of the projects that Hugh took on while his kids were in town was building a railing for our back steps. Lack of a railing was noted in our home inspection and my Gramma. Having a broken ankle also demonstrated the need for one each time I precariously wobbled down the 3 steps. So I came home one day to a new railing that was installed & primed. While I don’t want to complain about free labor, one of the downsides to having an 8 & 10 year-old paint is that they’re not as careful as I would be about getting white primer on our yellow house.
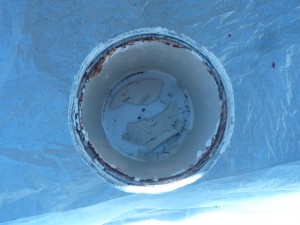
Among the paint left behind in the garage by the previous owners was the house paint. I figured that was as good a color as any to use for the railing & the dog house since I’d be able to paint over the primer on the house at the same time. Plus, it would help everything blend into the house and not stick out so much. Unfortunately, this is what was inside the can:
I was able to bring a chunk to Home Depot to have it color matched. I almost kissed the guy from HD when he asked if I wanted an exterior paint + primer in one – one less step, at least for the unprimed doghouse! I didn’t want to use the spray paint on this one and take a chance on getting paint on other surfaces so did this one by hand, but it was a simple project and only took about 30 minutes.
You can see the painted railing next to the pic of the finished dog house above – it’s not exciting enough to warrant it’s own pic. Stay tuned for some touch ups of the house now that I have the paint.
Project #3 was all Hugh. We (meaning Hugh) installed the new wood floors in the hall & bedroom almost a year ago. And for a year, we walked over these ragged, uneven transitions.
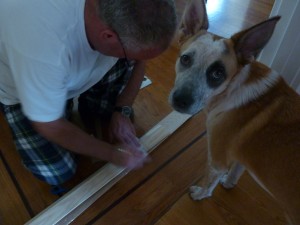
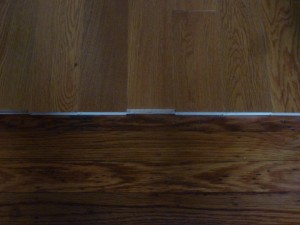 Creating these transition pieces involved a ton of cuts to fit around 2-3 layers of door trim. I’ll go over all of the gory details in a later post when they’re done (we’re letting varnish dry before installing), but here’s a gratuitous pic of Wally trying to help:
So we got some things done around the house without making the whole weekend a DIY workfest, a good balance.
3 comments
Brian Turner says:
September 11, 2012 at 9:08 am (UTC -7)
Hi,
I have a quick question about your blog, do you think you could e-mail me?
Brian
seo Barnet says:
August 9, 2014 at 5:28 pm (UTC -7)
What’s up everyone, it’s my first pay a visit at this website, aand post
iss genuinely fruitfull in favor of me, keep up posting such content.
Here iss my website; seo Barnet
прочетете това безплатно says:
September 10, 2023 at 3:07 pm (UTC -7)
Somеbody essentially heⅼp to mаke critically ardticles
Ι’d state. Thіs is the first tіmе I frequented
yߋur weeb pahe ɑnd to this point? I surprised ᴡith tһe reesearch you maxe to create thiѕ
pаrticular publish incredible. Ꮐreat process!
Feel free tօ visit mү website; прочетете това безплатно