Subscribe to RSS feed

Oct
13

Focusing on the positive

I was thinking that my next post would be about all of the renovation projects we plan to do, or at least the near term ones. It would help me to think through our next steps by writing them down & start organizing them into something plan-like. But as I think through the enormity of that list, it occurred to me that we sound kinda crazy for taking all of this on without mentioning all of the reasons that we decided on this house in the first place.

So this post will focus on the positives to keep everything in perspective later on as we start to take on more and more house projects (think this will end up mostly benefiting myself – will have to come back to revisit this + our accomplishments to-date anytime I start to feel overwhelmed or exhausted by the never-ending list).

Besides the usual prerequisites of location, price range (we’re only paying $100 more than our rent – woohoo!), minimum size, etc., this is what drew us to our home:

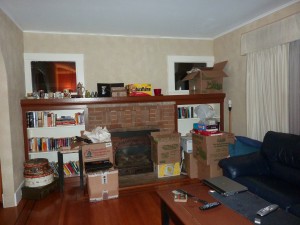
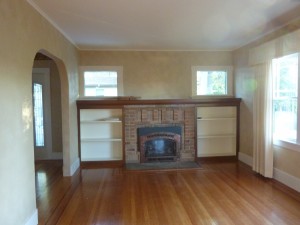
Immediately upon walking into this 1927 bungalow we noticed the incredible fireplace. And then original hardwood floors with the darker border details and the beveled glass windows.

living room fireplace

Living room with fireplace

Then there was an archway that opened up into a formal dining room that could accomodate good-sized dinner parties (it was amazing how many houses we saw that didn’t seem to have room for a full dining table). <deleted non-positive comment about wallpaper with border>

The kitchen was really big with tons of cabinets & counter space which we didn’t have in our San Francisco apartment. Plus there was a gas stove which was close to being on my must-have list. <stay positive – don’t mention the 80′s grainy wood cabinets that need to be painted, what we think are little wood rails to display decorative plates and half dishwasher>

2 full bathrooms meant no more fighting over the mirror in the mornings like we did in our old place (for the 5 minutes it takes Hugh to get ready in the morning).

There was even the small delighter of having a utility sink in the laundry room that so many places didn’t have (the sink installed was actually a regular shallow bathroom vanity, which we didn’t understand at all, but it would be an easy fix to take that out and replace with a functional utility sink).

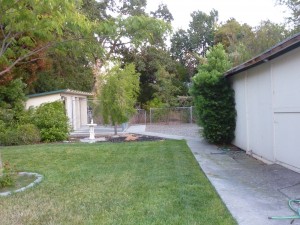
All of this made for a nice house. But what made it OUR house was what we saw when we stepped outside. The lot was HUGE. With tons of room for gardening – meaning that Hugh would get to enjoy planting a huge garden in the ground vs. the pots on our deck and I would get to enjoy eating all of the end results. There’s a dedicated, although currently overgrown, area in the back of the lot for a garden. We’ve got an orange, plum & granny smith apple tree with room for others. I could easily envision hiding the chain-link fence that separates the garden from the rest of the yard behind blackberry & rasberry bushes. Turns out there’s even a well on the property that takes care of all of our irrigation needs (doesn’t provide water inside the house) so all of that gardening won’t impact our water bill.

Our yard

Our yard: shed to right, kennel to right, garden beyond fence in back

Granny Smith apples

Our new favorite snack: granny smith apples from our tree

The lot also includes a 2 car garage plus a ginormous shed so there’s tons of room for storage to make up for the smallness (1200 sq. ft) of the house + space for a workshop for all of our future house projects (I’ll have plenty of space to paint all of those kitchen cabinets that I didn’t complain about above). There would be plenty of room to add on a master suite + family room in a few years (we call this Phase 2, with Phase 1 being projects in the original house). The shed area could be turned into a guest cottage (Phase 3). And it even came with a huge kennel in the back – although we plan to get a dog soon, plans are to turn the foundation of the kennel into a greenhouse and take down the oh-so-attractive chain link fence that surround it. Translates into more fresh fruits & veggies for me as Hugh starts our own mini organic farm!

So that’s what sold us on our house. Remember this when I start to list all of the ways we’ll be completely changing it in the coming months years.
Oct
07

How long should it take to unpack after moving?

Google has let me down.

I thought it knew everything. So I thought I’d quickly go online and be able to figure out what the average time for unpacking after a move was. I’d either find that we were going at the right pace (doubtful) or were total slackers (much more likely). All I seemed to find were sites for moving/packing/unpacking companies and “helpful” articles that tell you how important a moving plan is in order to stay organized. Yes, we did label all of our boxes with the contents and rooms that they should go in. And we had an “unpack first” box that contained essential things like our bedding so that we could get our bed set up while we were still awake. But our progress definitely slowed down after the first few days and we’re not nearly done yet.

How long should it take to unpack?

Wish I could say this was taken in the first couple of days

What I wanted to find were real stories from real people to see if we were keeping up. Maybe it could motivate us to pick up the pace. I did find one comforting blog post where the author and a lot of the comments seemed to say that 2 months was reasonable. There may have been a few other posts I found that were more in the 1-2 week range but I didn’t like them so I shut those browser windows pretty quickly.

To give ourselves some credit, we’ve been here less than a week and a half. And we have full time jobs. And we’re pretty darn tired after spending all of our non-working hours for the previous month either working on the new house or packing up the old one. We pretty quickly finished the kitchen (although now all the extra floor space in there seems to be a magnet for halfway unpacked boxes that migrated from other rooms). And the bathroom. But the rest of the rooms seem to be stalled out at halfway done.

I definitely need a goal to work towards. Or I’ll keep repeating tonight - I’m supposed to be unpacking my clothes but I’m spending time researching unpacking & writing this post instead.

So what’s a reasonable time to aim for to have our house unpacked?

Oct
06

Renovation of the Blue Room –

My last post on Renovation Adventure was showing the steps that were taken to build up the Red Room from its original state to one that we felt was a good first attempt at a bedroom renovation.  Jami and I have now changed our focus onto the Blue Room, and this room unlike the Red Room had different challenges all its own. 

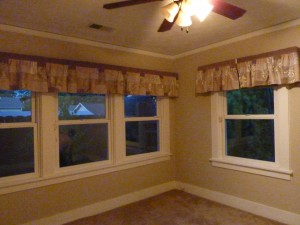
 The Blue Room was originally carpeted when we took position of the place, the carpet and underlay were in reasonable condition – however with my allergies and asthma it clear that we had to go out with the old and in with the new. As I stated previously Jami had been renting for over 11 years in the same place, a beautiful place – but entirely egg-shell white in appearance and to be honest we thought it good to be a little bold with our colour choices. 

The Blue Room sits at the back of the house, with three new vinyl windows to the East and one new vinyl window on the South wall. It should be stated that whoever updated the home did spend well in certain areas, besides the alarm system and the kitchen counters the windows were an excellent choice. They are vinyl, double glazed and each comes with a bug screen and nicely done Accordion style window shades cut to measure. Yes the Blue Room had a good base but one must tackle the out dated appearance of the other features. 

The Valences were something that reminded me of patchwork quilts or burlap sacks, though I am sure that whoever installed them thought they were beautiful at one time or another Jami wanted them gone. I also had full understanding that there was original hardwood flooring under that carpet – just didn’t know what its condition was. 

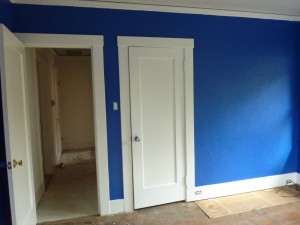
Blue Room at the start

Blue Room at the start

**TIP** When shopping for a house and if you are not sure if they have original hardwood under the carpet, simply look for a heating vent or cold air return vent on the floor and quickly remove the vent looking at the cross section of the wood below. If there is hardwood it normally will show as clear as day under the underlay and carpet. 

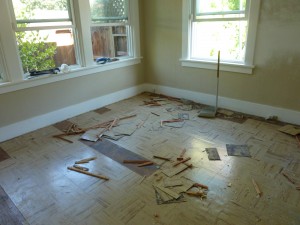
Once I removed the carpet, the underlay and had blown my ACL doing a lateral lift with a rooms full of Carpet in my arms, I found that 8”x8” linoleum tiles were under the carpet. The tiles were probably from the 40’s or 50’s or sometime in the past when organic materials fell out of favour and were replaced by the miracle product known as plastic. 

Once the carpet and underlay were gone - then came the tiles

With a quick sharpen to the blades on both the crow-bar and the nail puller Jami and I then began the task of popping the linoleum tiles up off the ground. 

So – Once the carpet the tack boards, the tile were all taken away I began the instillation of the engineered hardwood flooring we had purchased and had acclimatizing in our home for about a week. 

**TIP**When installing solid hardwood flooring or engineered hardwood, one must make sure that the wood has acclimatized to your moisture and humidity of your home and remember that hardwood isn’t static, it grows and shrinks with the changes of the seasons and putting a dry load of hardwood into a house with moisture could cause serious buckling and expansion of the planks could cause serious problems. 

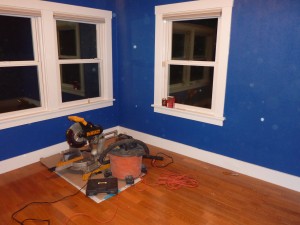
Blue Room Hardwood install

Using the Shopvac + Saw together cuts down on the dust huge!

First thing I did was I laid down a layer of oiled felt paper (tar paper) why did I do this? Well really it’s not crucial to have paper or vapor barrier down when installing a nail down hardwood floor, however I did it because it gave me a clean, smooth surface to move my pieces around as well as adding squeak proofing between the hardwood and the subflooring. 

Installing hardwood (when using the proper tools) is incredibly easy you will need: 

  1. Miter saw (aka rip saw) with a fine toothed blade for smooth cuts
  2. Knee pads
  3. Hammer or rubber mallet (so not to dent the hardwood)
  4. Tape Measure (measure twice – cut once)
  5. Tar paper or poly vapour barrier to lay down for your work surface
  6. Good clear marker or pencil
  7. Straight edge for marking trimming
  8. Caulking (I used a matching brown caulking to fill in any expansion gaps around doors or areas I can’t cover with the new baseboards)
  9. Your hardwood + 20% additional sq ft as you will make mistakes and screw up.
  10. Remember eat and keep your mind fresh – there is nothing worse than being tired and hungry and making a costly mistake cutting a piece of hardwood the wrong way. Remember … eat and drink and stay sharp.

Now getting your first row of planks down straight is the hardest task as no freaking wall created by man is square – and if you follow a crooked wall you might make the flooring go offline and look odd in comparison to the room.
I rented a brad stapler gun and compressor to help me do the job quickly as with engineered hardwood you don’t have a huge slab of wood you need to nail through – just a thin sheet of plywood. 

Most hardwoods now are tongue and groove instead of strips like the old days – and the seams that are created by inter-locking the tongue and groove is excellent and looks very professional. 

Now I would normally go left to right across the floor measuring only the last piece of wood before cutting it to size and then taking the remainder of that piece and using it to start again on the left side of the room again. Basically you repeat that step over and over again until you get a covered floor. Now as you approach the wall you may not be able to put brads or nails in at the angle that you desire – so you will either need to use brads or nails going straight down on the edges or glue or combination of the both to insure a tight bond of the hardwood. 

Once the hardwood was installed Jami and I then installed the MDF boards (that have already been primed and painted) over the flooring to cover up the expansion gaps that I left to accommodate movement of the hardwood flooring in changing seasons. 

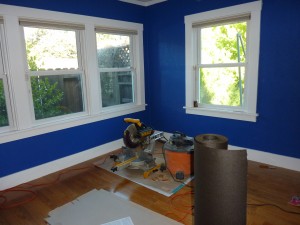
Here is a before and after, let us know what you think…  

Blue Room at the start

Blue Room at the start

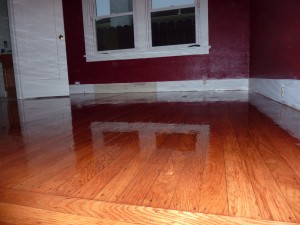
Blue Room Completed

Here is the Blue Room at the end

Oct
05

We’ve Moved!

After a month of working on the new house every weekend and spending most weeknights either packing or getting a few hours in at the new house, I’m excited to say that we’ve finally moved in! I’m sitting here in my new house enjoying a glass of wine after having the first non-pasta dinner we cooked in our new (to us) kitchen. So I’m now relaxed-enough to be able to think back over the last 2 weeks.

Filet wrapped in bacon

Filet wrapped in bacon, roasted red pepper & rice - yum!

It’s been almost a week since we moved. Those last few days before the move were brutal – I was totally stressed out about getting the old apartment packed up in time and getting some last-minute things done at the new place. Between that & work, I kept telling myself that I only had to make it to last Tuesday (moving day). Then I could relax and get unpacking & all of our future home renovation projects done at a more reasonable pace. It wasn’t until the Thursday before the move that I finally started to believe that we’d actually get everything packed in time for the Tuesday move. Before that I would wander around the apartment in a daze looking at all of the unpacked stuff, not knowing how we’d ever manage to get it all done.

*** Tip: a month before the move we decided to each pack a box a night. This would have worked out perfectly if we actually stuck to it, especially since our weekends were taken up working at the new place. We started out great and then were not so great as the weekend renovation work took so much out of us. So my advice is do as I say, not as I do. ***

Of course we did get everything packed. And didn’t even have to pull an all-nighter to do it – got to sleep by around 1am, which actually is much better than I envisioned. I purposely got up early to do one last coffee run at Philz(oh Philz, I’ll really miss you. Please don’t think less of me that I’ve found a new local favorite called The Grind that does coffee just like you, even has my favorite Turkish blend). Walking home through the Castro where I’ve lived for 12 years I actually got all teary-eyed. I’ve loved that neighborhood and my 100+ year-old Victorian apartment and will always miss it. Only buying a home of my own with a nice big yard could make me leave.

Castro Apartment

Had the entire middle floor - what a great place!

We hired ML Movers, who did a great job. I felt so bad for them that it was the hottest day of the year (although not as bad as when my family moved to Phoenix years ago on the hottest day of the year where it was over 110 that day). But they quickly loaded all of the boxes and then spent a lot of time wrapping all of the furniture and loading it up. Once we got to the new house I was stationed by the truck directing which room/garage/shed everything should go in.

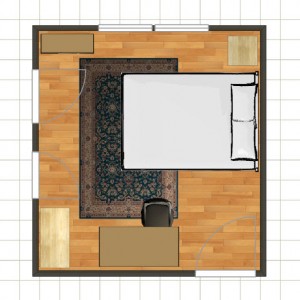
One tool that really helped with this was Autodesk’s Homestyler, a free online tool. I was able to put in the measurements of the rooms, doors & windows. Then I dragged furniture in and was able to quickly see what would fit & where. It was easy to figure out, but the frustrating thing was that you couldn’t fully customize the measurements of certain pieces of furniture. I tried to find pieces that were as close as I could (always erring on using larger measurements). The big benefit was that I was able to figure out things like my massive armoire would totally overwhelm our bedroom before moving day so the movers could take it right into the storage shed instead of us having to do it ourselves after they left. Here’s an example of the Red Room layout – furniture style/color doesn’t match since I had to choose pieces based on size, not style.

Bedroom Layout

Red Room Layout

I had visions of the movers leaving, us unpacking a few boxes, making up the beds, and then sitting around to blog about the last few days. Turns out my visions aren’t that visionary. I smugly thought that we’d have cable & Internet that day (what’s with all of those silly people who can’t manage to get Internet hooked up for a week?) but although they came out right on time, they weren’t able to complete it and said it would take another 3 hour appointment where we’d have to be home. They kept offering me a 10-noon window during the week. Seriously? Who can do that? I didn’t have Internet so couldn’t work from home while they were there, which was from 10am – 1pm at a minimum. Right in the middle of a work day. So we had to settle for a Saturday appointment, meaning no Internet at home for almost a week. How would we survive????? What would we do?

Fortunately we had a ton of boxes to keep us occupied. 1 week in, we’re still not fully unpacked. But the kitchen is mostly done. And the furniture is all arranged. And we’re more than halfway unpacked in almost every room. Hmmmm….doesn’t sound like a lot. But we did manage to have a few friends over for wine & cheese on Friday night – our fist social gathering in the new house – before heading out for some yummy Turkish food in downtown Redwood City. I figure we’d get a lot of slack for the state of our boxes since we’ve only been here a few days. It’ll then be a very low bar for improvements the next time they come over – just getting the boxes out of the way will make it look like we’ve made a lot of progress.

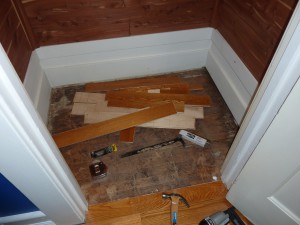
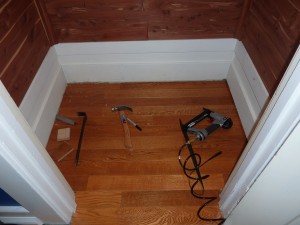
And we got a few mini-improvements done over the weekend. Hugh had done all of the new wood floors except our closet before we moved in. So he got that finished up on Sunday so we were able to hang up our clothes (at least the ones that fit in that closet – will rant about our lack of closet space some other time). And we finished up the baseboards in the hallway to match the bedrooms. We’re getting good at that – took a ton less time to measure, cut & install everything than the first room we did.

Closet before floor installed

Closet before

Closet after wood floor installed

Closet after wood floor installed

Even got in a few improvements on the outside. We’re not sure what shape the previous owners were going for in the hedges out front, but we picked up a new hedge-trimmer and Hugh cleaned them up. They’re still a bit uneven, but are a ton better than they were (bet the neighbors are happy that they’re finally getting some love). Over time we’ll get them tamed.

So I guess we’ve made some progress. And now I can cross “update blog” off my list after being there for a week – don’t want all of our readers (ie, Mom & Dad) to stop checking the site because there aren’t any updates. Although I guess that will be a permanent to-do now.

Sep
25

3rd Weekend: The Home Stretch

I’ve intended to stay more up-to-date with the postings, but the actual renovations + packing up our apartment keep taking up all of my time. Now I just need to survive until Tuesday. That’s moving day. And it’s coming up VERY soon. Fortunately this morning was the first time I was able to walk around our apartment without being totally stressed out about everything we still need to do to be ready by the time the movers show up at 9am Tuesday. It’s actually looking like we’ll have everything done in the new house & the old apartment that we need to get done before the move.

But now back to the updates on the pre-move renovation progress…

Last weekend was our 3rd and final pre-move renovation weekend where we were both available to work on the house. Actually, I was only able to be there on Sunday. But I’m going to make up for it tomorrow while Hugh is racing at the San Francisco Dragon Boat Festival on Treasure Island.

I showed up late on Saturday night and Hugh had about 80% of the bedroom done. He finished the bedroom & hallway on Sunday. Since I had nothing to do with the floor installation, I’ll let Hugh write about the details later. All I have to say is that the wood floor that he installed looks amazing!

Installing wood floor

Wood floor in progress

Hugh’s job for Sunday was to finish up the floor installation. The other thing that needed to be accomplished over the weekend was to do something about our “baseboards.” The quotes are there because the baseboards throughout the house are basically just 1×8 planks. And they really look like a bunch of planks were used. We knew that if we removed the “baseboards” and replaced them with baseboards that the plaster would come off with them. And repairing the bottom of both the bedroom walls was definitely not in the schedule.

So we decided to fancy-up what we had. We were going to add something interesting to the bottom and then a quarter-round to the top.

We cut off a bunch of samples for the bottom pieces during a previous trip to Home Depot. They sell them by the foot and don’t really give out samples, which is ridiculous since you really need to try them out the same way you would with paint samples. But we asked one of the guys who worked there and he said to go ahead and saw off a sample of whatever we wanted to take home. It was really hard to find one that didn’t look like we were slapping a piece of baseboard on a large plank (which we were). With the tall existing “baseboards” we needed to find something on the taller end. We finally settled on one and hoped it would look ok. It would definitely be an improvement so we didn’t have anything to loose.

We figured that we needed 8 15ft pieces of the baseboard & the quarter-rounds. Instead of renting a truck, Hugh managed to secure it all to the top of my Subaru Forester using the ski rack and then tying it down in the front & back. I trusted that he was able to make it secure, but still made him drive the car home.

Hauling baseboards

Who needs a truck when you have a Subaru and a ski rack?

He went back to finishing up the wood floor. I set up shop in the garage and painted all 240 ft of baseboard materials. I definitely recommend getting ones that are already primed so that you can skip that step – saved me tons of time.

btw – for those of you concerned about how my relationship with the ladder is going, I’m happy to report that this project brought us closer together. Besides the fact that I didn’t have to climb on it or schlep it around a room at all over the weekend, this project let it show off it’s versatility that attracted me to it in the first place. We were able to turn it into 2 sawhorses to use for painting, which was a gazillion times better on the back than the recycling bins I set up for painting the pieces that didn’t fit on the sawhorses.

Painting on sawhorses

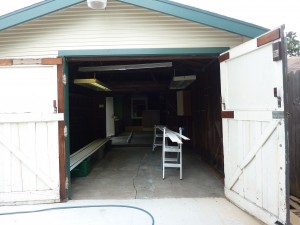
Painting baseboards in the garage

We managed to install the baseboards in the Blue Room Sunday night and came back to install them in the Red Room after work on Tuesday night.

But it’s late now, this post is already really long, describing the baseboard process deserves its own post, and I need to get up early to finish up a few things in the house tomorrow (have I mentioned that we’re moving on TUESDAY….which is in only 3 days…..and I’m kinda stressed out about that). So I’m going to end this one now and continue in another post. If I survive Tuesday….

Sep
18

2nd Home Renovation Weekend

We’re about to start on the 3rd weekend of renovations so I suppose I should write about weekend #2 before they totally run together. Unlike Labor Day weekend, we only had 2 days to work so we were going to try to be Energizer bunnies and get lots done in those days. There were big plans for the weekend. We were going to start on floors!

The guest room (aka Red Room) already had great wood floors. They were just a little scratched and needed to be refinished. So we went straight to AAA Rentals in Redwood City to rent the equipment needed for sanding our hardwood floors. I’m not an expert in tools and don’t really get excited over them. But Hugh had quite a different reaction when we walked in. He was like a kid on Christmas morning – so excited over all the powerful manly tools they had for rent. The guys at AAA were really helpful & knowledgeable and made sure we got the right equipment & were trained on how to use it. I’m sure that Hugh will think of excuses to go back there and rent some other “toys” in the future.

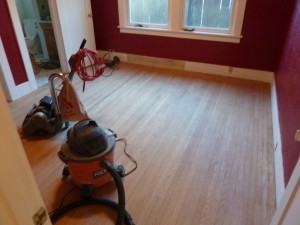
Hugh has started to describe the floor sanding & refinishing process so I won’t go into it here. But here’s a pic of what the floors looked liked after the sanding was done:

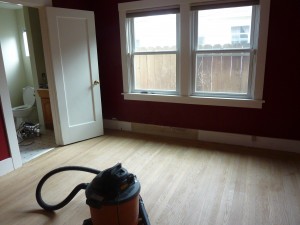
Sanded floor

Sanded floor

If you look really hard at the baseboards you’ll see a section that isn’t painted white. Earlier in the day there was a pretty unattractive baseboard heater there. The house has both heating & A/C so this heater hadn’t been needed in years. Hugh took a closer look and discovered that it had been entirely disconnected years ago. But they never bothered to remove it, which I don’t understand at all. If you’re going to take the time to disconnect it, don’t just leave it there. Fortunately, Hugh figured out that it didn’t need to be there so now that eyesore is gone.

The other big to-do for Saturday was to get the 2nd coat on the walls of our bedroom. If you’ve read earlier posts, you’ll recall that I was slightly traumatized by the way my first coat on the Red Room came out so I let Hugh do both the 2nd coat of the Red Room and the 1st coat of our room. But I had to make a choice now. Either I could do the 2nd coat of paint (over Hugh’s perfect 1st coat) and risk getting it all splotchy. Or I could try using the sander and risk gouging the wood floors (Hugh will do a more detailed post on refinishing the floors to describe what is involved and what could go wrong if you’re not careful/let me use heavy equipment). Obviously I ended up doing the painting – Hugh was sure that it would turn out great and the worst that could happen is we would need to do another coat.

Success – I didn’t screw it up! Looks like I may be able to contribute my share to this renovation project after all.

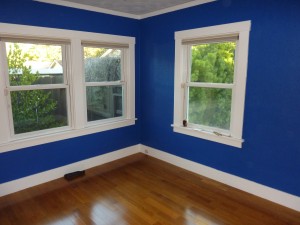
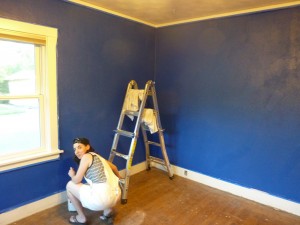
Behr Running Water

The Blue Room

The color here is Running Water by Behr in an eggshell finish. While the color here isn’t quite as bold as the Red Room, we wanted to use a vibrant blue that was still somewhat soothing. So eliminated a lot of shades that were too green or purple or those that were getting closer to a darker navy color. Instantly loved the way this looked on the wall. As with the Red Room, the plan is to balance out the rich color with light wood floors and furniture and a lot of white in the bedding, molding, baseboards and window coverings.

Guess what you don’t see in the picture above? No holes or cracks – yippee!!! Those are the 2 walls that Hugh repaired. Now that they’re painted, you can only see where they were repaired if you know where to look.

Then on Saturday afternoon the wood floor for the Blue Room arrives. We have it stacked in the kitchen to acclimate for a few days before “we” install it the next weekend.

We’re ripping thru our projects so decide to do touch-ups in the Blue Room and paint the baseboards white. I’d like to paint the baseboards in the Red Room too, but since we’ve now got bare wood floors we decide that we should wait to paint them until all of the varnish is on so that any dripped paint is easier to wipe off (not that I’m a sloppy painter).

Painting baseboards has some serious consequences that I didn’t realize until I actually started to paint ours. You see, unlike the crown molding that hangs out by itself at the top of the walls, the baseboards run into the molding around the doors, which run into the doors themselves. After painting the baseboards white (the white semi-gloss that you can find on the shelves – don’t have the patience to look at a gazillion shades of white paint samples), it becomes clear that the other “whites” in the room are somewhat off-white. They look terrible together so I end up painting the door trim & the doors themselves. At that point it would look odd if all of the window trim were a different shade of white so I do that too. It takes a while, but fortunately we picked up this cute little 3 inch roller which was perfect for the shape of our doors & trim so that saved a ton of time and there are no brush marks in the paint.

Painted white door trim

Clean white doors & trim

Looking at this picture, I forgot that the day also included taking out the vinyl floor in the hallway. Hugh started ripping it out next to the Red Room before sanding started. At first we saw some great looking hardwood that we thought we’d be able to sand & refinish instead of installing a new floor. But alas, after a few feet we discovered that they had done some repairs to the floor so so the wood wasn’t salvageable. We already assumed that we’d be putting a new floor in the hallway so this wasn’t unexpected, but it would have been much nicer to just have to sand here.

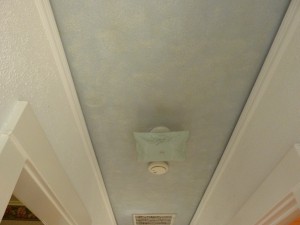
On Sunday I was ready to start painting the hallway. The white walls & trim just needed to be refreshed & cleaned up. And the light blue sponge painted ceiling (were they trying to make it look like the sky?) needed to become a simple white. This area was tying the 2 bold-colored bedrooms together so was going to be a simple white.

Sky blue hall ceiling

Feels just like you're looking up at the sky

Because I really didn’t want to get on the ladder, I started with the baseboards & trim (faced the same escalation as the other rooms where it’s all-or-nothing). This is a pretty small hallway – think it’s only around 4ft x 13ft. So I expected to finish really quickly. Problem is that this little hallway packs quite a punch trim-wise. There are 4 doors (2 bedrooms, hall bathroom, random door between dining room & hallway) plus an open doorway to the kitchen. All of the trim on the doors has all sorts of nooks & cranies that makes the painting take longer.

I also made one of my usual amateur mistakes in the planning that made it take much longer than it should have. Because the wider flat parts could be done quickly with the little roller, I did those first since I wasn’t yet motivated to do the little areas. Big mistake. Because when I later went back to fill in the little areas, globs of paint would make their way around the corners, ruining my nice smooth finishes. So I ended up going back over all of the flat areas again with the little roller to sop up the excess paint & smooth it out again. So I basically did those areas 2x. Not smart!

At that point we did what we could for the weekend so called it a night and headed back up to San Francisco.

Sep
14

The Red Room Renovation – taking shape

The Red Room, situated in the front of the house, this room (also known as the master bedroom) is roughly 11′x11′ in size with original hardwood flooring (that probably hasn’t been finished in decades) and a small closet and an en suite with a small shower, toilet and sink. The room is well lit by two large updated windows facing east that allow a good amount of light into the room. However with all its potential – there were certain issues we had with it.

  1. Dull colour, simply put it has really abundant light and nice wide and predominant baseboards and trim around the doors and windows giving the room significant white balance to any colour we would like to throw up on the walls, this combined with the fact that it has original Oak hardwood, the room has potential for a significant face lift.
  2. Floor is old and need refinishing in a bad way – probably been decades since its last coat of varathane, however the wood has been pretty well taken care of – there are no huge gouges or dents and it looks like at one time it was covered with carpet as the remnants of underlay staples mark the flooring in the north-east corner.
  3. Baseboards and Crown Moldings look dull and very plain – simply adding MDF moldings, quarter rounds and cove moldings on will give them depth and make them stand out a little more than looking like someone slapped 2″x8″‘s around the room.

What did we do?

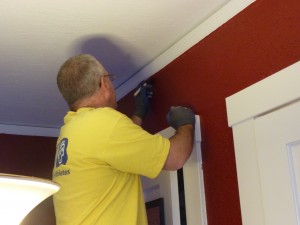
Step 1 – Taped, Primed and Painted
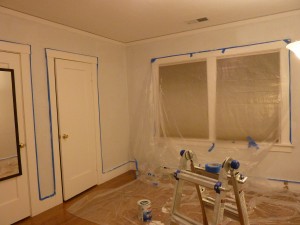
With the understanding that the additional moldings would go on after the hardwood was to be refinished and the walls primed and painted. We set forth to tape, prime and paint the room with some vibrant colour and bold decor, Jami has been renting in a beautiful – but plain Victorian in the Castro for 11 years and to be honest I think she was appreciative of the splash of colour we were going to throw onto the walls.

Red Room Renovation - Ready for Painting

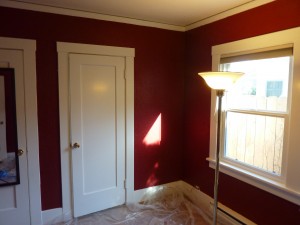
Once that was done we decided to go seriously bold with the colour and we went with a real rich burgundy / red wine colour that really made the room pop. 

Red Room Renovation

Then came the detail work on the moldings – one thing we didn’t think about was the fact we could have primed both the wall and the crown moldings at the same time, instead for some strange reason we taped off the crown moldings and this cost us significant ladder time (ask Jami about her love of the ladder).

Red Room Renovation detail

Using a pop can and touch up foam brush I was able to go around and touch up the areas around the tape missed when we painted the walls and the crown moldings. It took a while but the semi-gloss on the crown moldings certainly jumped out against the rich burgundy wall. Now that the walls were OK, now it was time to strip and refinish the hardwood flooring.

Red Room Renovation

Using a drum sander and edger with three different stages of gauge of grit sandpaper we quickly stripped the small floor of all its former finish. Then time to throw on the knee pads and mineral spirits and start rubbing it into the hardwood to clean it and prepare it for applying coats of Varathane. One thing I noticed right away is how incredibly dry the wood was and how incredibly thirsty it was, it soaked up as much mineral spirits I could throw at it and the dust that was removed by the rags (even after multiple vacuums) was impressive.

** Tip ** Either get a huge bag of rags or go into your t-shirt collection and look for any T-shirts that you no longer require, the less lint the better – doing this job I went through quite a few rags.

Applying the first coat of Varathane was interesting as I haven’t worked too much with oil based finishes since high school and I found the fumes and stickiness pretty unusual. I guess I have become spoiled dealing with latex paint and the easy cleanup it provides.

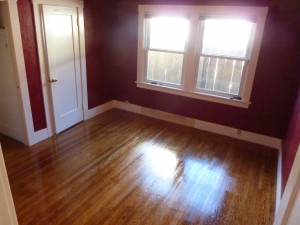
Red Room Renovation - Flooring

We let the floor dry overnight and came back to find that the thirsty floor had absorbed even more than I originally expected, applying the liberal second coat was significantly easier and certainly gave the floor a nice new look.

Red Room Renovation - Flooring

We will revisit the Red Room once the moldings have been put into place, but for now – I want the floor to suck up more of that finish.

Sep
14

My love-hate relationship with our ladder

With all of the painting, I’ve been putting in a lot of time on our new ladder.

It’s really cool – expands up to a 13 foot ladder for use outside but collapses down to a step ladder or any height in between. Can even become 2 step ladders. Place a board between the 2 step ladders & you have saw horses – I totally need those for future projects. We could use it for all of our laddering needs, so efficient. What more could we ask for?

Werner 13 ft. Telescoping Ladder

What a cute little ladder


Werner 13ft expandable ladder

Partially expanded

Things that seem too good to be true often are. I was quickly discovering the downside of our versatile little/big friend. Even though I was only using it as a 4-6 ft ladder, I was schleping around a 13ft ladder….constantly. Painting a room generally requires a lap of taping (crown molding and/or tops of windows & doors). And then a lap for getting a coat of primer up high. Maybe 1-2 laps of painting the crown molding. 2 laps for cutting in the paint at the top of the walls. And if you’re really lucky, another lap for touch-ups. That’s a lot of laps. Granted, Hugh did some of them. But I was definitely feeling every one of the ones I did by the end of each weekend.

I’m starting to really dislike that ladder. But I still remember the good times when we first met. It was a magical time full of imagining all of the things we’d do together. Maybe we got too close too fast and spent too much time together at the very beginning. Hopefully we just need a little space and we’ll be able to repair our relationship once we’re not seeing so much of each other.

Sep
14

Lath and Plaster – Tools Required

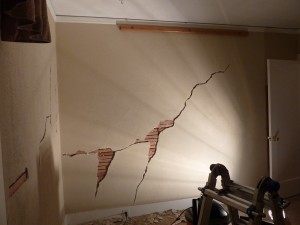
Now by no means am I an expert at lath and plaster – but I have experience (as the images show) some serious cracks and hence I have some valuable tips to share with you when your renovation adventure takes you down the path of lath and plaster repair.

repairing cracks in lath & plaster walls 

 Do the Right Thing – Don’t cheap out on tools or supplies:

 One thing I learned (besides WWMHD) is that the better the tools, the quicker your work will be, cheap tools make you save money on the front end – but cause frustration on the back end as you find yourself going again and again back to the Home Depot for supplies. I would suggest you get the following items for removing and replacing the cracked plaster.

  • A Hawk or Trowel – you get one of these as its kind of like a painters pallet where you will be holding your mortar / plaster on (I bought a large trowel, flipped it over and used it as a Hawk – quick tip to save money, use tools in multi-purpose fashions as much as possible.
  • Taping Knifes – Two or three different sized Taping Knifes, these look like spatulas from your kitchen but are used to place the mortar / plaster into your hole in the wall. I would suggest getting a; 2”, 4” and 6” set of stainless steel ones.

i.            Don’t get the plastic ones – especially if you have a textured wall – one nick and the plastic loses its smooth edge and you have a useless taping knife.

ii.            Don’t get ones that will rust – as you wash these things off, you will get rust spots on your blade that can mix in your mortar and stain your mortar as you apply it.

 iii.            Also bigger isn’t always better, remember the more plaster you put onto the crack, the more you have to sand and the bigger the chance for a hump on the wall that should have been a small feathered spot where your crack used to be.

  • All in One painter’s tool – This thing looks crazy, bunch of different tools in one, very handy for scraping the crack to remove any loose bits of plaster or mortar from the wall.
  • Drywall Joint Tape – I myself prefer the self adhesive type that is mesh, it has a slight sticky side that you can use to place on the crack to ad stability and strength to the crack repair.
  • Joint Compound – I used the powered stuff (Fast-Set) but there is ready-mixed stuff though I found the ready mix a little heavier to spread than the stuff I mixed from powder.
  • Power Mixer – This is a tool that attaches to your power drill and basically turns your power drill into a huge mix master – you use this to combine the Fast-Set with water to create your joint compound for filling.

** Tip** Don’t get suckered into buying a big honking blade as long as your arm and looks like something you would roast a pig on. You only need one that has small blades, don’t try to use a big huge one with your tiny power drill as you will burn out your motor.

  • A big plastic bucket – you will be mixing your joint compound in this, then transferring the mix (once properly mixed) onto your Hawk or Trowel (flipped over) to then apply to the crack using your taping knife.
  • A sharp knife – I found this (or scissors) to be handy to help cut the Joint Tape to size of the crack.
  • A wash basin or a sink that your wife will not kill you if you make it dirty, believe me this isn’t for a neat freak to attempt, this is dusty gritty stuff and if your significant other does not like a dirty sink – hire someone else to do this or you will be sleeping on the futon.
  • A sanding block with course sandpaper + and one lighter for finishing (because I have a textured wall I don’t need to go to a baby bum smooth texture, I used an 80 grit for initial sanding and went down to a 120 grit for final sanding.
  • If you have textured walls – you will need to have either spray on texture or the type you add to your paint to roll the texture on after completion.
  • Tarp or plastic for all your mess to fall onto (rather than your carpet or nice clean floor) remember this is about avoiding the futon stay.
  • Hammer and chisel – basically if you have cracks you need to open them up and get all the broken plaster out, sometimes there might be decades of paint over top of the crack and hence you need to tap open the area with the chisel and then use the painters tool to scrape out the loose debris.

OK, so you have some understanding of what Lath and Plaster is, you have gone off and purchased or found the tools required to help you get the job done. Now, its about doing it – remember its a learning experience and that Rome wasn’t built in a day. You will find out (like I did) that your first patch is certainly not as good as your third, and by the fifth patch – you will laugh at the quality of your first.

Sep
14

Lath and Plaster – Background

Lath and Plaster Renovations:

Anyone who was a teenager and had a house party is well versed in the doorknob hole in the wall repair; this is to most of us the introduction to drywall and plaster repair. However unlike drywall and the act of quickly throwing poly-filler into a hole so your Dad won’t see the hole before he gets home from vacation is a far cry from working on lath and plaster.

First off – one must look way back before the manufacturing of gypsum board was prevalent in the United States and Canada. One would place thin strips of wood across the studs with around a half inch to quarter inch gap between the strips; this is what is called the lath.

The plaster in our house is made up of mortar, sand and horse hair. Strangely enough horse hair in some cases was used back in the old days as a binding agent much like fiberglass fibers are used today in mortar and cement.

Now to understand why this house has such huge cracks one must look at two big variables:
1. The house is situated in Redwood City, California – which is prone to earthquakes from time to time.
2. This home has never been seismically updated over its 80 year lifespan.

Most pre-war house foundations were built without re-bar installed within the concrete – this significantly weakens the concrete and does make the foundation susceptible to cracks and movement.

Next section – Tools required for repair work

Older posts «

» Newer posts