I meant to get this going before the renovation began, but we’ve been a little busy with the actual renovations. So I’ll take a few posts to catch up and then will try to stay more up-to-date.
We closed on the house on 8/31. The plan is to move out of our apartment in San Francisco by 9/30. Before moving in, we want to get the 2 bedrooms done so that we can move in all of the furniture without having to move it in & out later. To do that, we need to refinish the existing hardwood floor in one and rip out the carpet in the other and install hardwood floors. We also need to paint both rooms. And if we’re painting walls and installing new floors, we might as well repaint the baseboards & crown molding as well.
Here’s what happened in the first few days. I’m not going to describe every trip to Home Depot, but it’s not far off to assume that each day included a trip there.
Tuesday 8/31: Picked up the keys – we’re homeowners!!!! Brought in a bunch of floor samples to try to match the new floor in our bedroom & hallway to the existing wood floors in the other rooms. Hugh called me 2 minutes after I was scheduled to meet our realtor to get the keys to see if his favorite sample (ie, the cheapest) matched. Of course it didn’t. Found that our floor was usually called something like Oak Caramel, Honey Oak or Butterscotch – yum!
Wednesday: Installed the new utility sink in the laundry room. There was already a regular bathroom vanity there, which was useless for trying to wash out paint brushes. But it was easy to take out and the existing hookups made it quick to hook up the new one. So glad we have this – not sure how we would be able to do any of our projects without it unless we got paint all over the kitchen sink, which is not a look I’m going for.
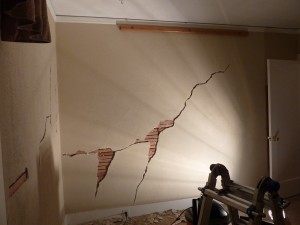
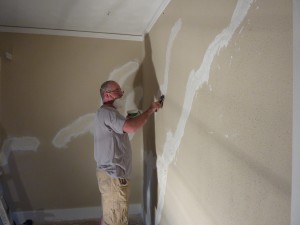
Then Hugh went about “fixing” the cracks in the walls of our bedroom. An 83 year-old lath & plaster wall is not the easiest to repair. We quickly had a number of rather large holes in the wall where the large cracks used to be. I started preparing myself to have to rip out all of the plaster and put up drywall, which wouldn’t be done by the time we needed to move in. But Hugh found some great how-to’s on YouTube and was confident he could do it. We’d know in the next few days if he was right.
I had picked out 3 color samples for each of the 2 bedrooms and painted swatches of each on the walls. Miraculously, we were completely in agreement about the shades we prefered for each room. Too easy!
Thursday: More fixing of the cracks/holes. There’s hope for our walls after all. Painting started as we primed the walls of the guest room/office.
Friday: I was a slacker and took the night off but Hugh went to the house to try to finish the wall repair so we’d be able to paint our bedroom over the weekend. To make the walls more complicated, they’re textured. So he needed to match the texture of the repairs to the current wall. He found a spray-on texture from Home Depot that looked like it would work. But when he came home on Friday night, he was totally bummed out saying that it didn’t match at all. We hoped we’d find something better at Home Depot the next day (please don’t make us start all over with drywall!).
So on a down note we tried to get some rest before the 3-day weekend of non-stop renovation projects started.


Leave a Reply