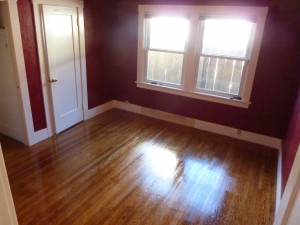
The Red Room, situated in the front of the house, this room (also known as the master bedroom) is roughly 11′x11′ in size with original hardwood flooring (that probably hasn’t been finished in decades) and a small closet and an en suite with a small shower, toilet and sink. The room is well lit by two large updated windows facing east that allow a good amount of light into the room. However with all its potential – there were certain issues we had with it.
- Dull colour, simply put it has really abundant light and nice wide and predominant baseboards and trim around the doors and windows giving the room significant white balance to any colour we would like to throw up on the walls, this combined with the fact that it has original Oak hardwood, the room has potential for a significant face lift.
- Floor is old and need refinishing in a bad way – probably been decades since its last coat of varathane, however the wood has been pretty well taken care of – there are no huge gouges or dents and it looks like at one time it was covered with carpet as the remnants of underlay staples mark the flooring in the north-east corner.
- Baseboards and Crown Moldings look dull and very plain – simply adding MDF moldings, quarter rounds and cove moldings on will give them depth and make them stand out a little more than looking like someone slapped 2″x8″‘s around the room.
What did we do?
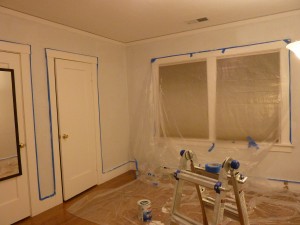
Step 1 – Taped, Primed and Painted
With the understanding that the additional moldings would go on after the hardwood was to be refinished and the walls primed and painted. We set forth to tape, prime and paint the room with some vibrant colour and bold decor, Jami has been renting in a beautiful – but plain Victorian in the Castro for 11 years and to be honest I think she was appreciative of the splash of colour we were going to throw onto the walls.
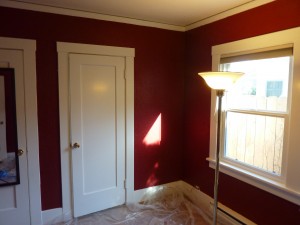
Once that was done we decided to go seriously bold with the colour and we went with a real rich burgundy / red wine colour that really made the room pop.Â
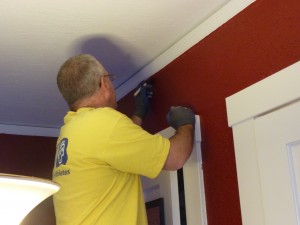
Then came the detail work on the moldings – one thing we didn’t think about was the fact we could have primed both the wall and the crown moldings at the same time, instead for some strange reason we taped off the crown moldings and this cost us significant ladder time (ask Jami about her love of the ladder).
Using a pop can and touch up foam brush I was able to go around and touch up the areas around the tape missed when we painted the walls and the crown moldings. It took a while but the semi-gloss on the crown moldings certainly jumped out against the rich burgundy wall. Now that the walls were OK, now it was time to strip and refinish the hardwood flooring.
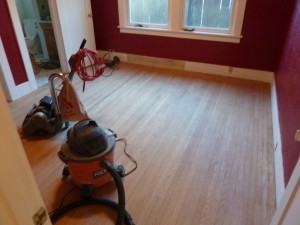
Using a drum sander and edger with three different stages of gauge of grit sandpaper we quickly stripped the small floor of all its former finish. Then time to throw on the knee pads and mineral spirits and start rubbing it into the hardwood to clean it and prepare it for applying coats of Varathane. One thing I noticed right away is how incredibly dry the wood was and how incredibly thirsty it was, it soaked up as much mineral spirits I could throw at it and the dust that was removed by the rags (even after multiple vacuums) was impressive.
** Tip ** Either get a huge bag of rags or go into your t-shirt collection and look for any T-shirts that you no longer require, the less lint the better – doing this job I went through quite a few rags.
Applying the first coat of Varathane was interesting as I haven’t worked too much with oil based finishes since high school and I found the fumes and stickiness pretty unusual. I guess I have become spoiled dealing with latex paint and the easy cleanup it provides.
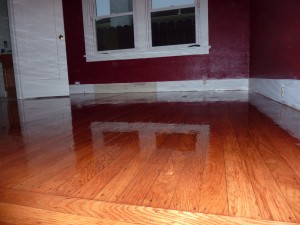
We let the floor dry overnight and came back to find that the thirsty floor had absorbed even more than I originally expected, applying the liberal second coat was significantly easier and certainly gave the floor a nice new look.
We will revisit the Red Room once the moldings have been put into place, but for now – I want the floor to suck up more of that finish.
5 comments
heather says:
September 15, 2010 at 9:00 am (UTC -7)
So, if I pay to fly you out to Boston, do you lend out your services?
huebdoo says:
September 15, 2010 at 8:19 pm (UTC -7)
I would lend out our services no problem – however this house seems to have the magical power that once one room is done, the one next to it will need to be redone.
Its an endless circle – then there is the back yard
Savannah says:
March 1, 2015 at 10:32 am (UTC -7)
Awesome post. You should use social websites to increase
traffic. There are tools which automate this time consuming process.Visitors can flood your page in no time, just type
in google for:
Rixisosa’s Social Automation
Burgundy Wall Paint | Fashion Your Home says:
July 15, 2016 at 7:52 am (UTC -7)
[…] Burgundy Wall Paint 3648 X 2736 Disclaimer : We do not own any of these pictures/graphics. All the images are not under our Copyrights and belong to their respective owners. All Pictures have been taken from different sources, If any Graphic / Image is offensive or under your Copyrights then please E-mail us via contact page to get it removed. […]
How Much To Refinish Hardwood Floors - Max Design says:
August 27, 2019 at 4:53 am (UTC -7)
[…] Download Plan More @ renovationadventure.com […]