Our renovation adventure isn’t limited to the inside of the house. We’ve started to adventure out in the back yard too. In addition to the never-ending quest to tame the growth back there, we’ve got big plans for a big garden overflowing with fruits and veggies.
But the soil back there (among other things) needs a lot of work. So we recently started composting. Hugh has done it before but this is my first experience (although living in San Francisco we did have compost collections every week).
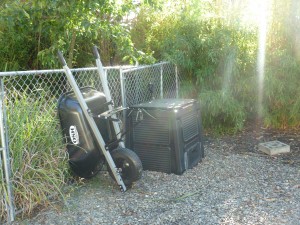
As all projects around here start off, during our weekly visit to Home Depot we picked up a compost bin.
We made some modifications to keep rats & other unwanted visitors out. Although our bin had a bottom piece, we also laid the bin down on ¼-inch wire mesh to prevent anyone from digging in. It also had little doors on the bottom for scooping out finished product. But the doors weren’t secure enough to keep out hungry pests so we permanently closed them by nailing them shut using scrap wood. We’ll either have to open them when the compost is done or shovel it out from the top.
I then excitedly scooped up as much yard waste as I could. Not only was I anxious to get the compost process started, but our yard waste bin was already full so sticking stuff in the composter was another way to clean up the yard.
I wasn’t until I finished that Hugh mentioned that the juniper from the front hedges may not be something that should go in compost. Um….wouldn’t it have been better to bring that up before I started filling the compost bin? He wasn’t positive, so I went inside to do some research. I had no idea that there were some composting no-no’s so I figured I should get myself educated in the composting arts ASAP.
Here’s what I found (most useful BEFORE you start):
What is good
- Grass clippings
- Leaves
- Hay/straw
- Other garden wastes (except those that aren’t good)
- Fruits & veggies
- Coffee grinds
- Egg shells
- Dryer lint
- Wood chips & sawdust
What is not so good
- Meat, bones, fats, dairy – they’re hard to break down and will attract critters
- Diseased plants
- Human and pet waste – really don’t want to think about the collection process for the human stuff
- Weeds that have gone to seed – unless you create a very hot compost pile, you’ll end up transplanting the weeds you added to your pile
- Newspaper – ink has chemicals
- Certain leaves (like the Juniper I added) should be used sparingly. So I just won’t add anymore juniper clippings in the future and we should be ok.
Hot vs. Cold: Compost piles can either be hot or cold. Hot piles are a factor of their size and the composition of materials added. They can get up to 140 degrees in the center. Both hot & cold piles will eventually turn into compost. But the hot ones can do it in a few months vs. up to a year for the cold ones. Since I am definitely not an authority in this (yet), see the links at the bottom of this post if you want more details.
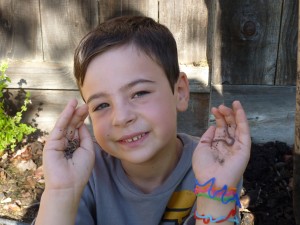
Worms: aka Vermicomposting. This is typically done indoors. Basically the worms eat your food scraps & poop out compost (that’s probably a gross oversimplification, but you get the idea). We’re not using this method, but when we find worms in our yard, we have a lovely relocation program for them in our compost bin. I haven’t found anything online about this hybrid method, but we’ll see what happens with ours. Hopefully they’re all happily eating, pooping and creating more little worm babies to speed the process along.
Air: The microbes that break down the compost need both air & water. So your bin needs to allow some airflow (although you also don’t want critters getting in and making a home there while feasting on your leftovers). You should also avoid smooshing down your pile. You’ll also get more air in the pile and a more even mix of your ingredients by turning/mixing of your pile every week or so.
Moisture: Your compost pile should be as moist as a wrung-out sponge. Some of that moisture will naturally occur from adding wet vegetation (especially wet grass clippings) or food. But you’ll also be adding things like dry leaves with no natural moisture. I don’t think we kept ours moist enough at first, but now when we take out our food scraps each week, we also fill up the bucket with water. This has the added bonus of cleaning out our stinky food scrap bucket at the same time.
Avoiding pests & stinkiness: besides ensuring that your compost container of choice doesn’t allow critters in, you can decrease the temptation and stench simply by burying food scraps underneath a few inches of dried leaves. Avoiding adding any meat or dairy products will also help. Despite our backyard being a veritable Wild Kingdom of unwanted critters, we haven’t had any issues by following this advice.
Balance: As with life in general, the key (and most difficult) part to composting is balance. You should have the right proportion of “greens†(fresh green grass/leaves and food scraps) for nitrogen and “browns†(dried grass/leaves) for carbon. The ideal mix is 4 parts brown to 1 part green. That’s one more thing we haven’t done. When we have yard clippings we throw them in. Whatever food scraps we have are added weekly. I’m sure there are a lot of amateur composters who just throw in materials as they become available like we’re doing. I’ll just consider this year an experiment for that method and see how it turns out. Which is basically how we’re approaching everything around here.
Multiple bins: since it takes months to complete the compost process, many people have 2-3 bins that they rotate between. When a bin is full and you’re waiting for the compost process to finish, you start adding to another. Since we have a lot of yard waste and can quickly fill up our large bin at certain times of the year, I think we’ll get at least 1 more since we have the space.
So now you know everything I do about composting. For anyone interested in more authoritative resources than me (especially in this inaugural experimentation year), here are some great composting sites to check out:
- VegWeb.com’s Composting Guide
- Garden of Oz’s Composting 101
- Composting 101.com
- compostinstructions.com
- homecompostingmadeeasy.com
- epa.gov composting info


Leave a Reply