We’re about to start on the 3rd weekend of renovations so I suppose I should write about weekend #2 before they totally run together. Unlike Labor Day weekend, we only had 2 days to work so we were going to try to be Energizer bunnies and get lots done in those days. There were big plans for the weekend. We were going to start on floors!
The guest room (aka Red Room) already had great wood floors. They were just a little scratched and needed to be refinished. So we went straight to AAA Rentals in Redwood City to rent the equipment needed for sanding our hardwood floors. I’m not an expert in tools and don’t really get excited over them. But Hugh had quite a different reaction when we walked in. He was like a kid on Christmas morning – so excited over all the powerful manly tools they had for rent. The guys at AAA were really helpful & knowledgeable and made sure we got the right equipment & were trained on how to use it. I’m sure that Hugh will think of excuses to go back there and rent some other “toys” in the future.
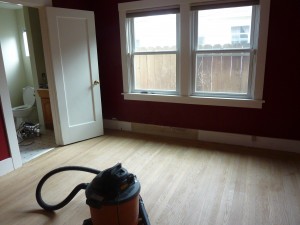
Hugh has started to describe the floor sanding & refinishing process so I won’t go into it here. But here’s a pic of what the floors looked liked after the sanding was done:
If you look really hard at the baseboards you’ll see a section that isn’t painted white. Earlier in the day there was a pretty unattractive baseboard heater there. The house has both heating & A/C so this heater hadn’t been needed in years. Hugh took a closer look and discovered that it had been entirely disconnected years ago. But they never bothered to remove it, which I don’t understand at all. If you’re going to take the time to disconnect it, don’t just leave it there. Fortunately, Hugh figured out that it didn’t need to be there so now that eyesore is gone.
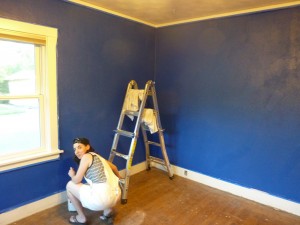
The other big to-do for Saturday was to get the 2nd coat on the walls of our bedroom. If you’ve read earlier posts, you’ll recall that I was slightly traumatized by the way my first coat on the Red Room came out so I let Hugh do both the 2nd coat of the Red Room and the 1st coat of our room. But I had to make a choice now. Either I could do the 2nd coat of paint (over Hugh’s perfect 1st coat) and risk getting it all splotchy. Or I could try using the sander and risk gouging the wood floors (Hugh will do a more detailed post on refinishing the floors to describe what is involved and what could go wrong if you’re not careful/let me use heavy equipment). Obviously I ended up doing the painting – Hugh was sure that it would turn out great and the worst that could happen is we would need to do another coat.
Success – I didn’t screw it up! Looks like I may be able to contribute my share to this renovation project after all.
The color here is Running Water by Behr in an eggshell finish. While the color here isn’t quite as bold as the Red Room, we wanted to use a vibrant blue that was still somewhat soothing. So eliminated a lot of shades that were too green or purple or those that were getting closer to a darker navy color. Instantly loved the way this looked on the wall. As with the Red Room, the plan is to balance out the rich color with light wood floors and furniture and a lot of white in the bedding, molding, baseboards and window coverings.
Guess what you don’t see in the picture above? No holes or cracks – yippee!!! Those are the 2 walls that Hugh repaired. Now that they’re painted, you can only see where they were repaired if you know where to look.
Then on Saturday afternoon the wood floor for the Blue Room arrives. We have it stacked in the kitchen to acclimate for a few days before “we” install it the next weekend.
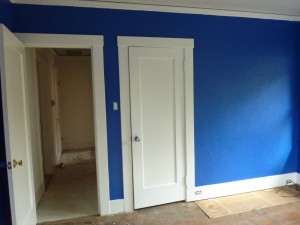
We’re ripping thru our projects so decide to do touch-ups in the Blue Room and paint the baseboards white. I’d like to paint the baseboards in the Red Room too, but since we’ve now got bare wood floors we decide that we should wait to paint them until all of the varnish is on so that any dripped paint is easier to wipe off (not that I’m a sloppy painter).
Painting baseboards has some serious consequences that I didn’t realize until I actually started to paint ours. You see, unlike the crown molding that hangs out by itself at the top of the walls, the baseboards run into the molding around the doors, which run into the doors themselves. After painting the baseboards white (the white semi-gloss that you can find on the shelves – don’t have the patience to look at a gazillion shades of white paint samples), it becomes clear that the other “whites” in the room are somewhat off-white. They look terrible together so I end up painting the door trim & the doors themselves. At that point it would look odd if all of the window trim were a different shade of white so I do that too. It takes a while, but fortunately we picked up this cute little 3 inch roller which was perfect for the shape of our doors & trim so that saved a ton of time and there are no brush marks in the paint.
Looking at this picture, I forgot that the day also included taking out the vinyl floor in the hallway. Hugh started ripping it out next to the Red Room before sanding started. At first we saw some great looking hardwood that we thought we’d be able to sand & refinish instead of installing a new floor. But alas, after a few feet we discovered that they had done some repairs to the floor so so the wood wasn’t salvageable. We already assumed that we’d be putting a new floor in the hallway so this wasn’t unexpected, but it would have been much nicer to just have to sand here.
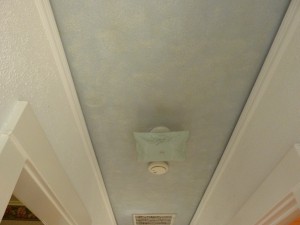
On Sunday I was ready to start painting the hallway. The white walls & trim just needed to be refreshed & cleaned up. And the light blue sponge painted ceiling (were they trying to make it look like the sky?) needed to become a simple white. This area was tying the 2 bold-colored bedrooms together so was going to be a simple white.
Because I really didn’t want to get on the ladder, I started with the baseboards & trim (faced the same escalation as the other rooms where it’s all-or-nothing). This is a pretty small hallway – think it’s only around 4ft x 13ft. So I expected to finish really quickly. Problem is that this little hallway packs quite a punch trim-wise. There are 4 doors (2 bedrooms, hall bathroom, random door between dining room & hallway) plus an open doorway to the kitchen. All of the trim on the doors has all sorts of nooks & cranies that makes the painting take longer.
I also made one of my usual amateur mistakes in the planning that made it take much longer than it should have. Because the wider flat parts could be done quickly with the little roller, I did those first since I wasn’t yet motivated to do the little areas. Big mistake. Because when I later went back to fill in the little areas, globs of paint would make their way around the corners, ruining my nice smooth finishes. So I ended up going back over all of the flat areas again with the little roller to sop up the excess paint & smooth it out again. So I basically did those areas 2x. Not smart!
At that point we did what we could for the weekend so called it a night and headed back up to San Francisco.


1 comment
Norman Brazee says:
May 18, 2013 at 11:18 am (UTC -7)
Home renovation frequently expands property esteem. This is one of the most normal purposes behind renovations, notwithstanding upgrading a home and making it more suited to your private tastes. Regarding renovations, some homeowners pick to utilize the utilities of expert builders. Renovation ventures might be truly exorbitant, specifically where you enroll the utilities of a master maker, inside fashioner or different pro. This is why some folks favor DIY (do it yourself) renovations, which might be more savvy, in particular where you have the aptitudes to do some of the assignments. So in the event that you are considering DIY home renovations, here is a post of renovation tips that may help you revamp your home. ”^.
http://caramoan.ph
Our own homepage